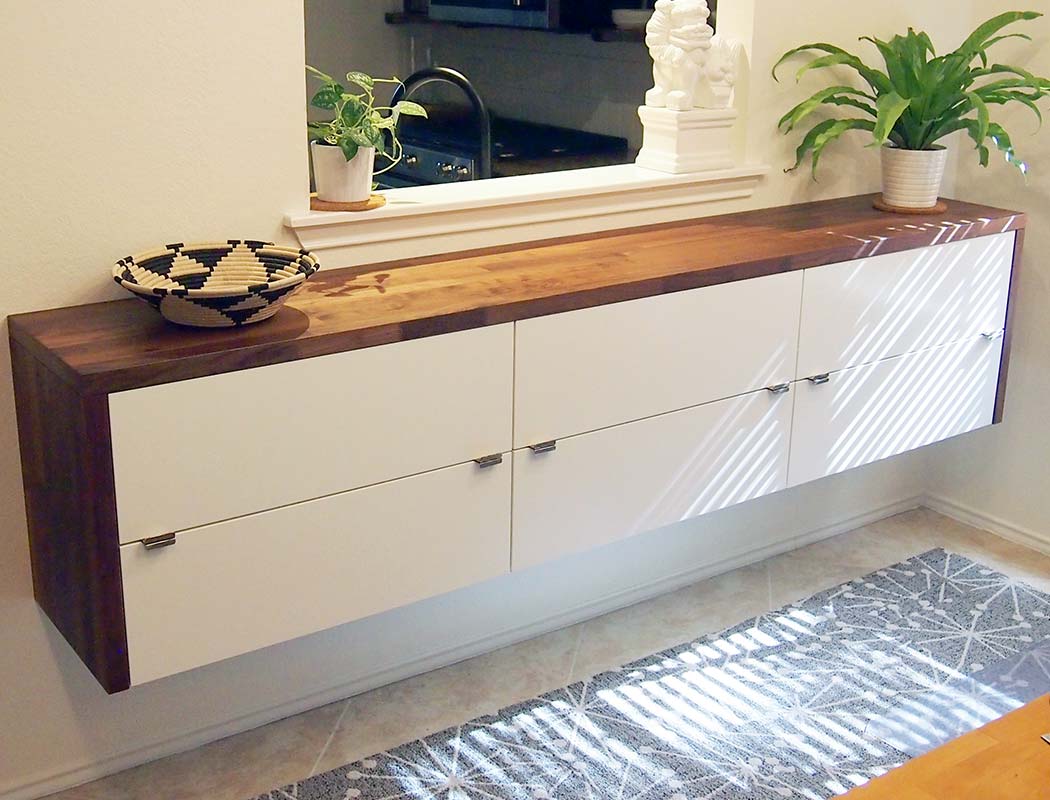
Bar cabinet IKEA hack
Long-Term Review, Last Updated: Winter 2022
Fauxdenza is still in daily use. There is little trace of the brass colored rub and buff on the handles remaining so I would pick something brass not aluminum for another go, everything else is holding up fantastically and looks like it did right after installation. 10/10 would DIY again :) Occasional water spots to cleanup from a nearby sink & plant watering… considering a coat of Waterlox to avoid any trouble, will update with photos if that happens.
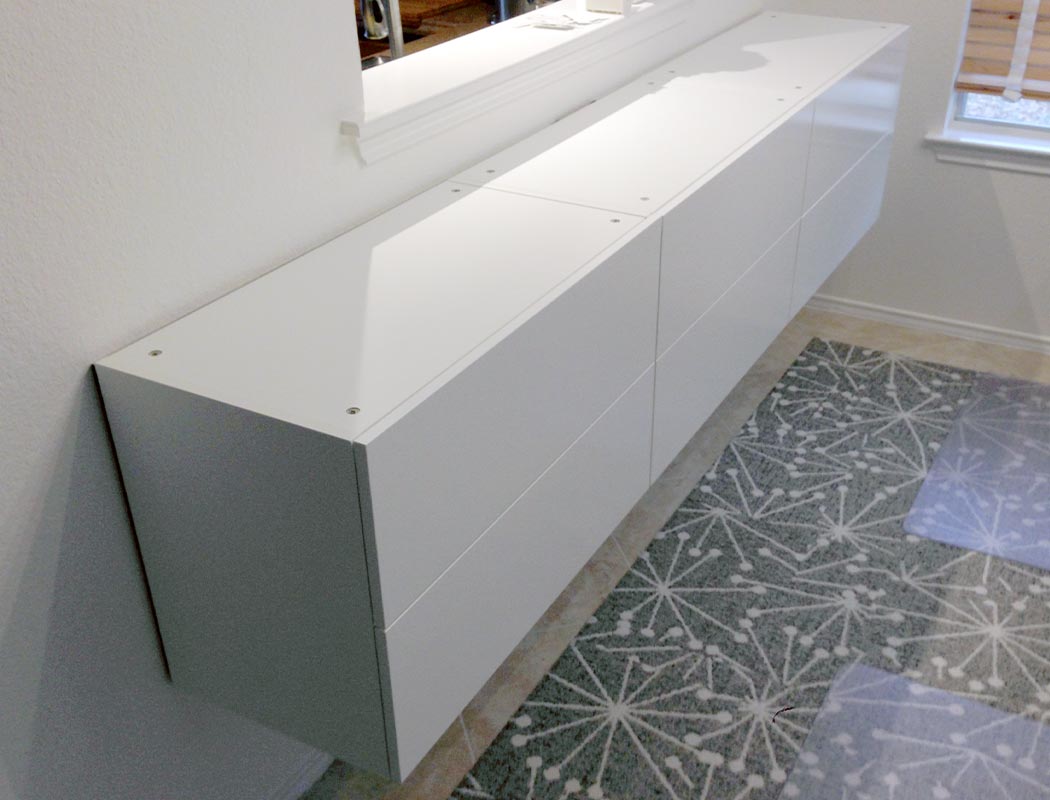
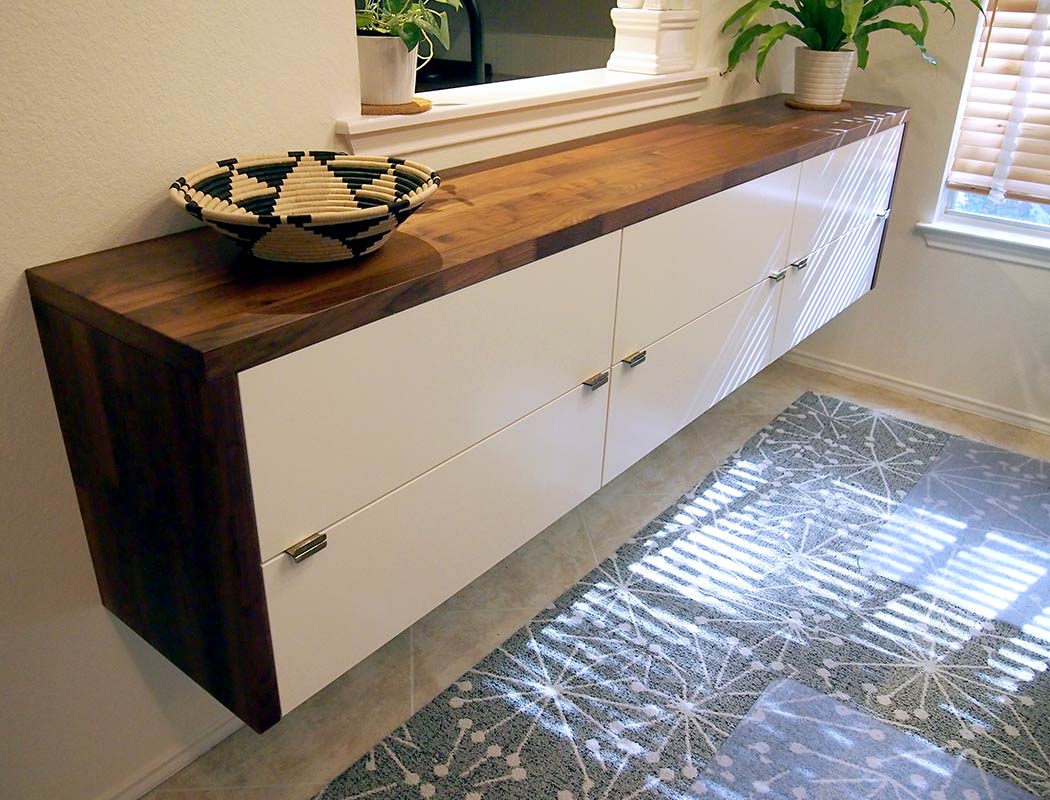
We used some wall mounted IKEA kitchen cabinets to add storage to our living room. For a few hundred in IKEA components we added a bunch of storage that gets daily use… art supplies, rechargeable batteries, cables, stamps, paper, mail, some bar supplies… all within reach and out of sight.

There are plenty of examples of fauxdenza looks from when they went around the web a while ago, some of our favorites we used for inspiration:
-
Fauxdenza at The Brick House
-
DIY Floating Sideboard at Nalle’s House
-
DIY Fauxdenza at Almost Makes Perfect
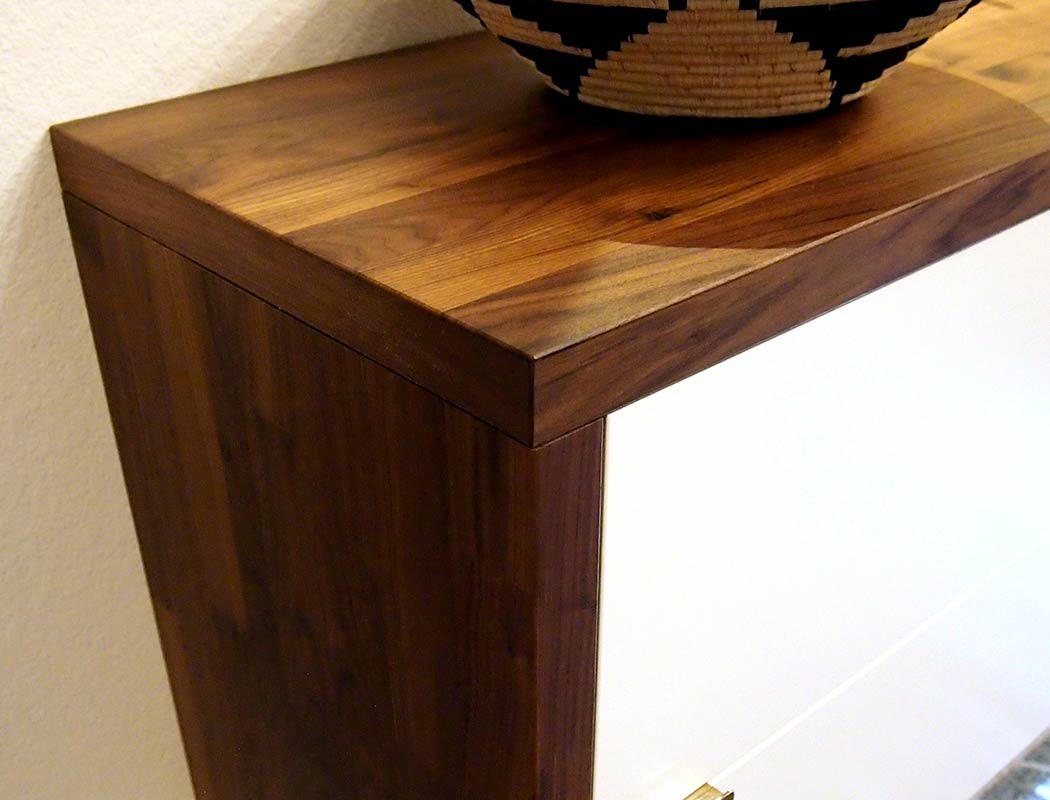
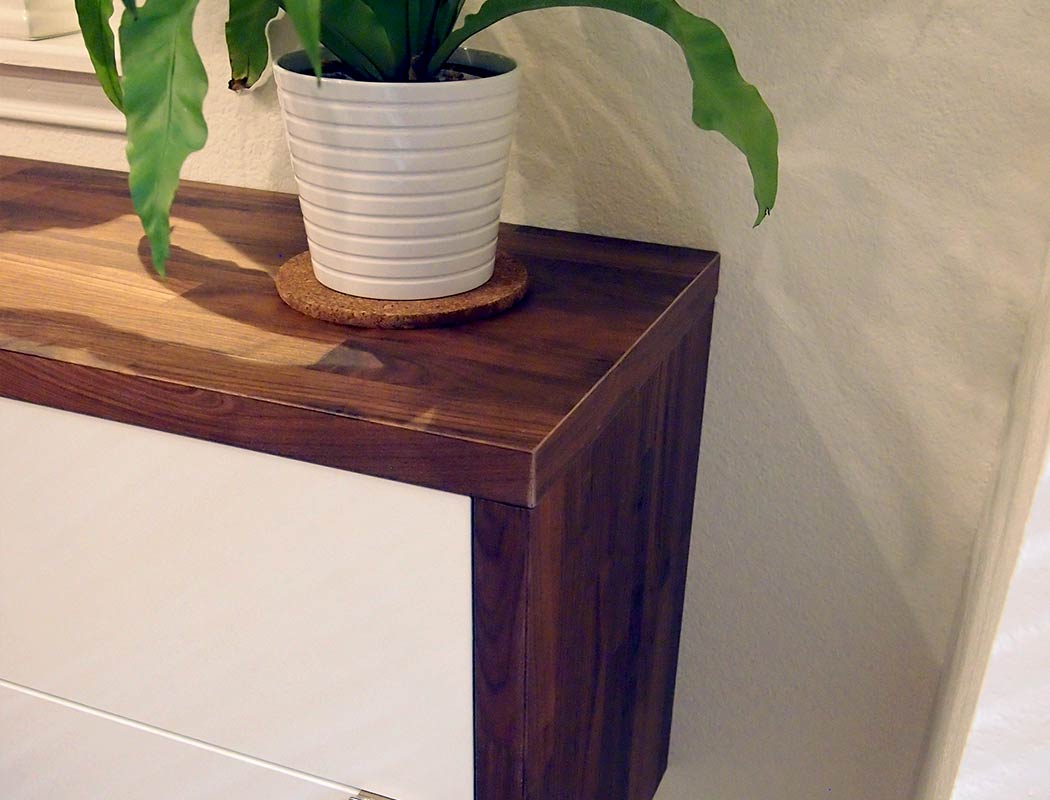
Legs, no-legs, wood wrapped with painted drawers or vice versa… plenty of great options floating around on Pinterest. We decided on a thick wood wrap but after spending some time trying to figure out how we were going to source, cut, and finish the wood we squinted at the measurements and realized that a single piece of IKEA countertop would wrap our measurements with some to spare.
Planning
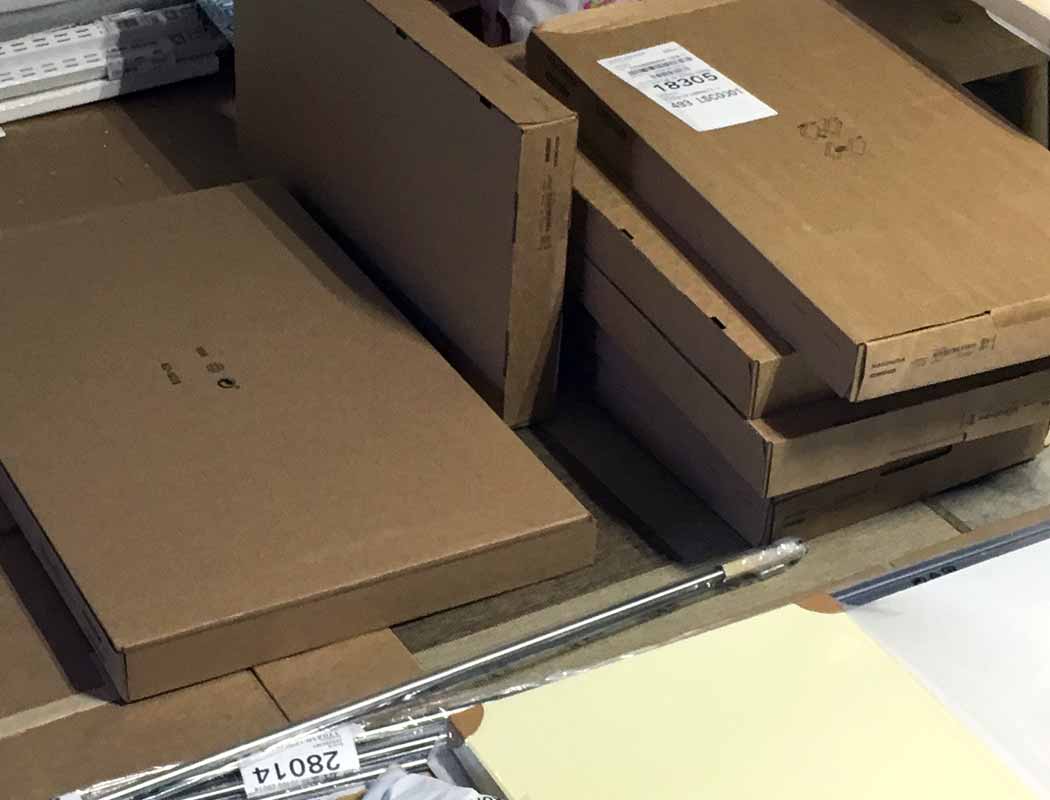
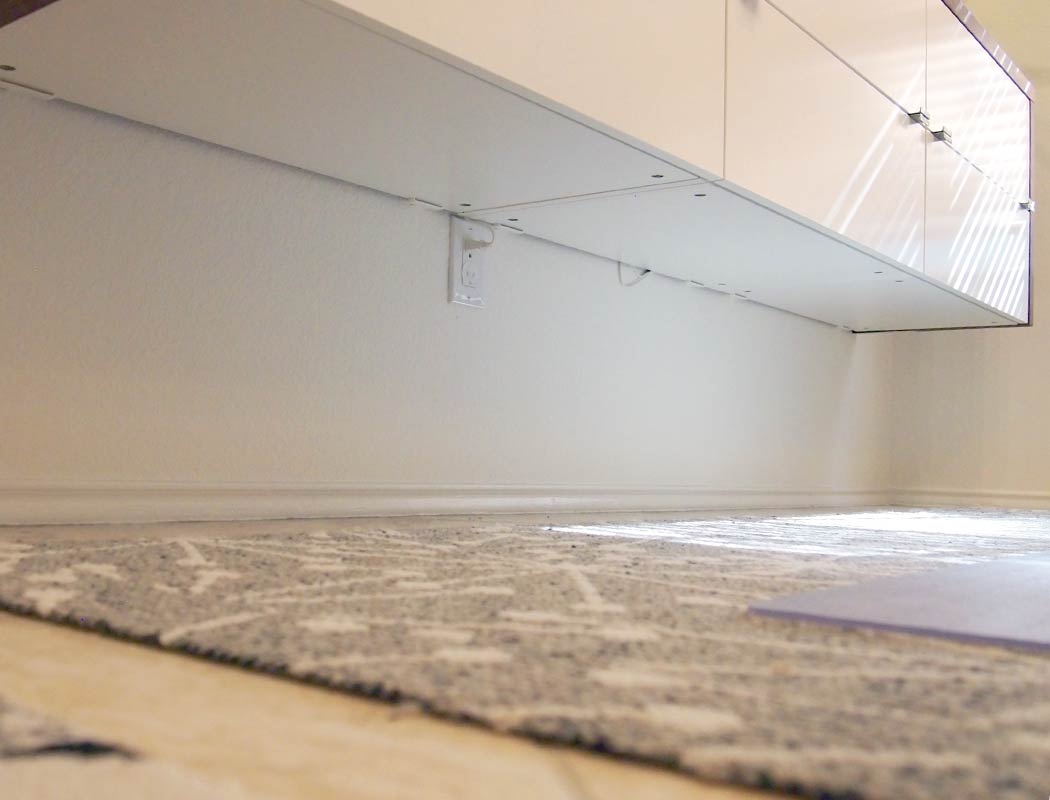
We changed our cabinet selections a few times based on fitting the available wall area. Before ordering you’ll want to confirm where you want the mounting railing that the cabinets sit on to be mounted (both vertically and horizontally). That means confirming that the location works with the available wall structure (and the location of the wall studs behind). Also, verify that the placement of existing outlets will work both for general use and if you’re going to do interior lighting (we ended up using shorter cabinets sitting just above the existing outlet). Read through IKEA’s cabinet installation instructions before ordering and know where you’re going to put everything on the wall. We ended up picking three top cabinets from all the various sizes you can find available on IKEA’s site.
Transporting
The largest piece of the project is the countertop, which required the longer of the two sizes IKEA offers:
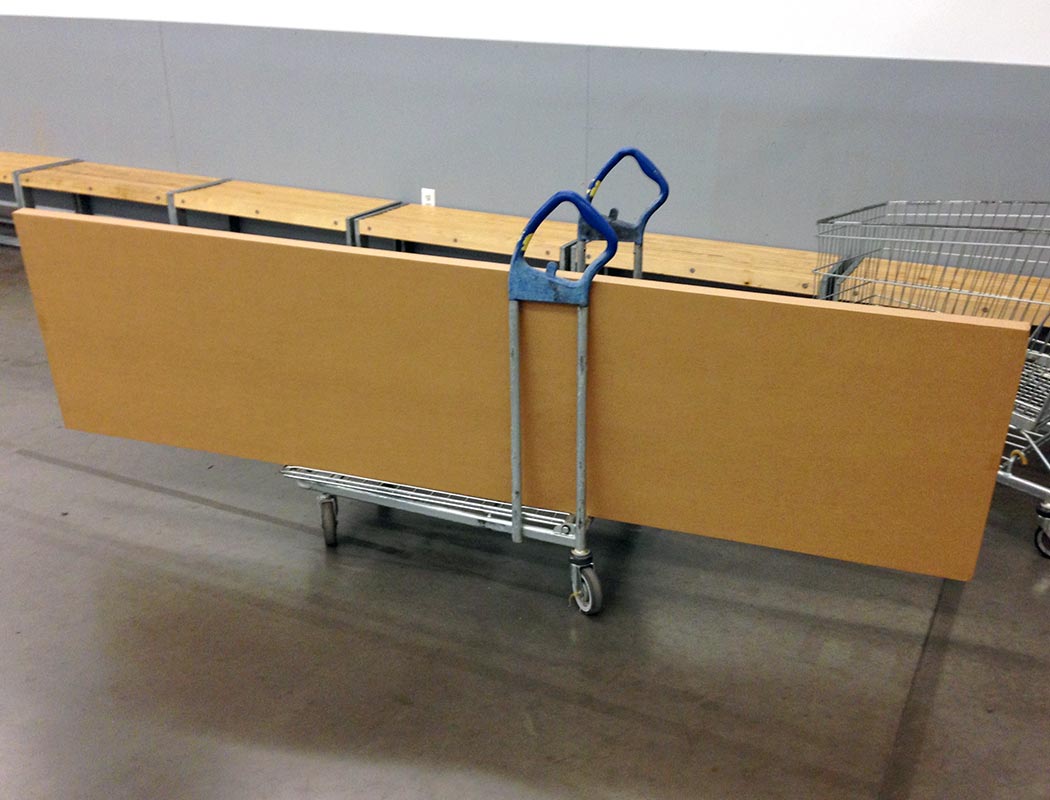
This was non-trivial to move (I drove home with the counter resting on both the dash in front of the passenter seat and the hatch in back with all the seats flopped down). You’ll definitely want to measure your vehicle before heading to IKEA (maybe twice).
Specific items * this post contains affiliate links
IKEA SEKTION cabinets, rail, MAXIMERA drawers, and countertop Amazon IKEA
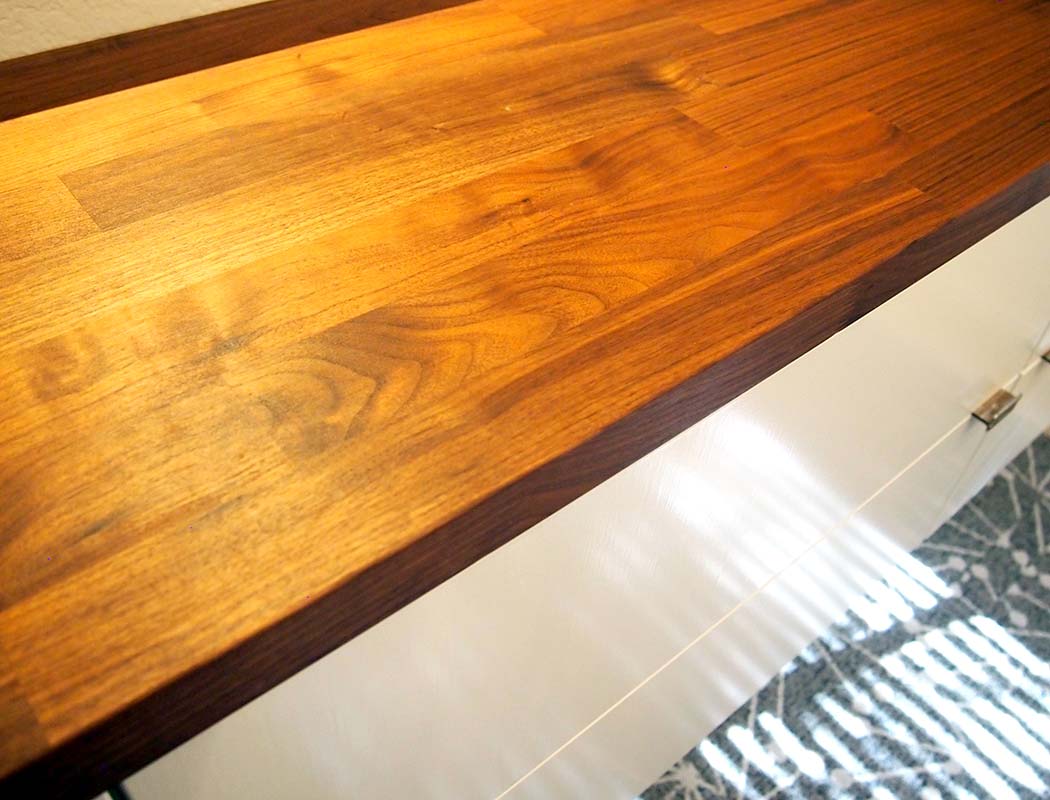
We used three white 30 x 14 3/4 x 20" cabinets (Article Number: 102.654.53), a rail (Article Number: 602.615.27), six medium drawer kits (Article Number: 802.656.71), and one walnut KARLBY Countertop (Article Number: 703.352.12). Doors and covered drawers are also available and you can mix and match.
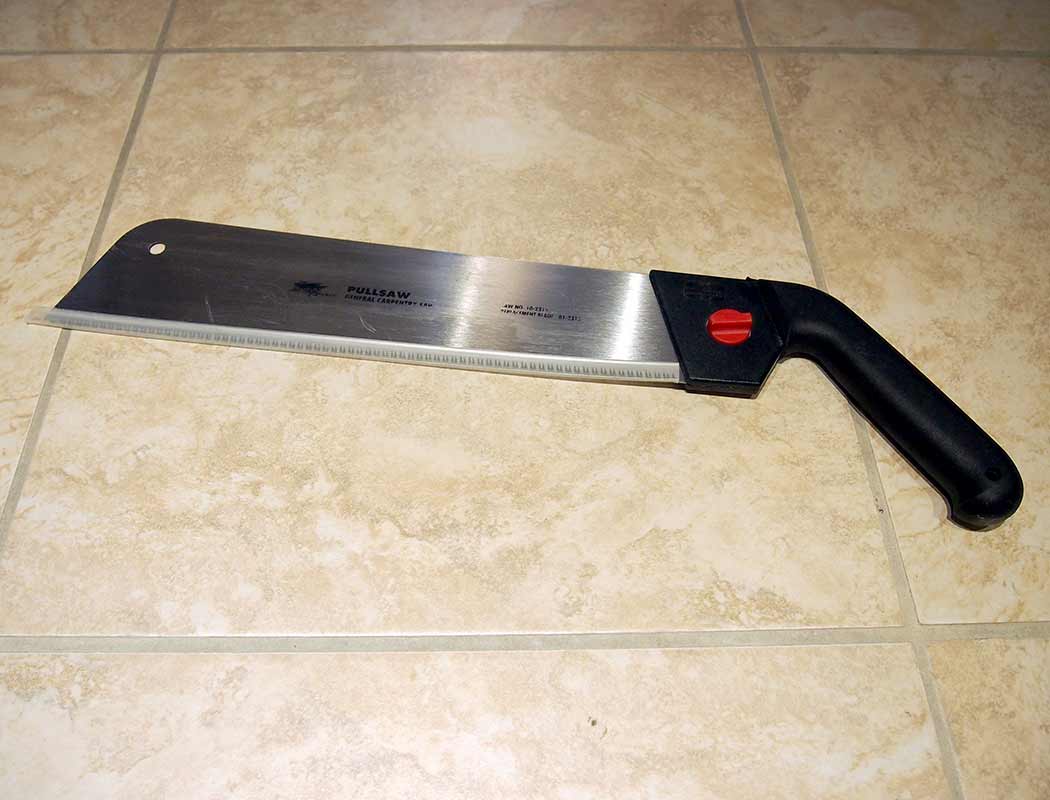
Shark 15-inch Carpentry Saw available here
I bought this sight unseen based on the The Wirecutter's recommendation, I love it (but don't have much to compare it too). If you have a circular saw and know how to use it I assume it would be a better (but not strictly necessary) choice for cutting pieces of countertop. That said, I'm accident prone so I also appreciate the lower stakes.
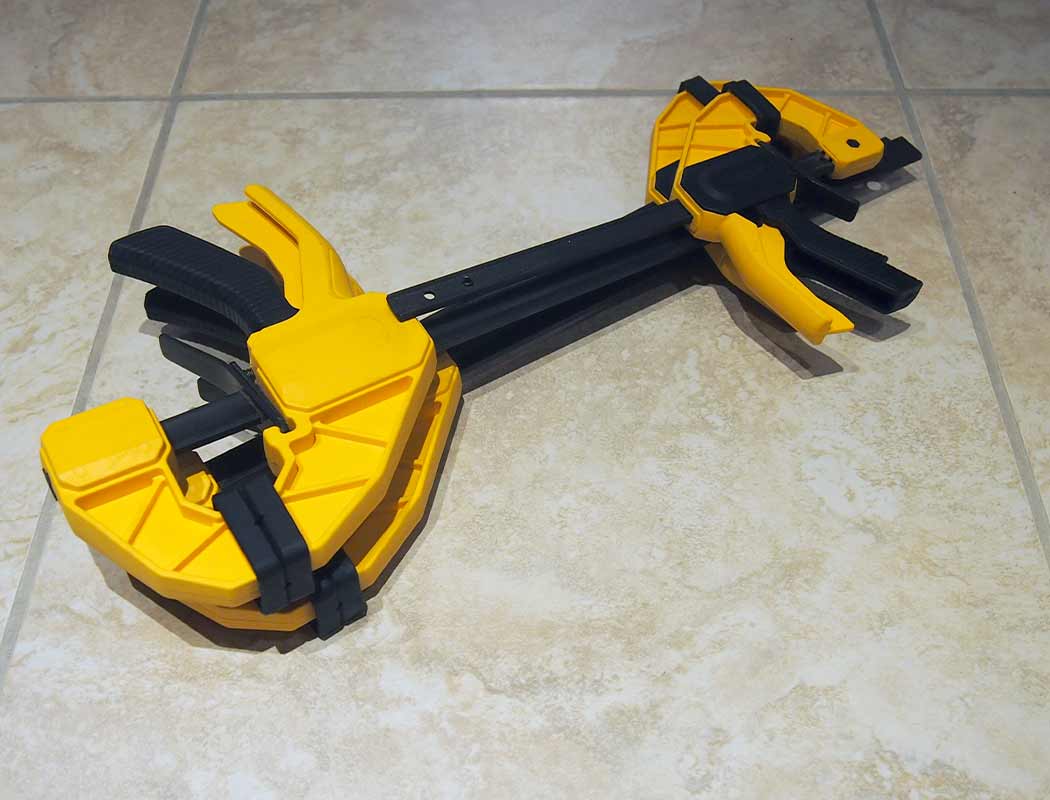
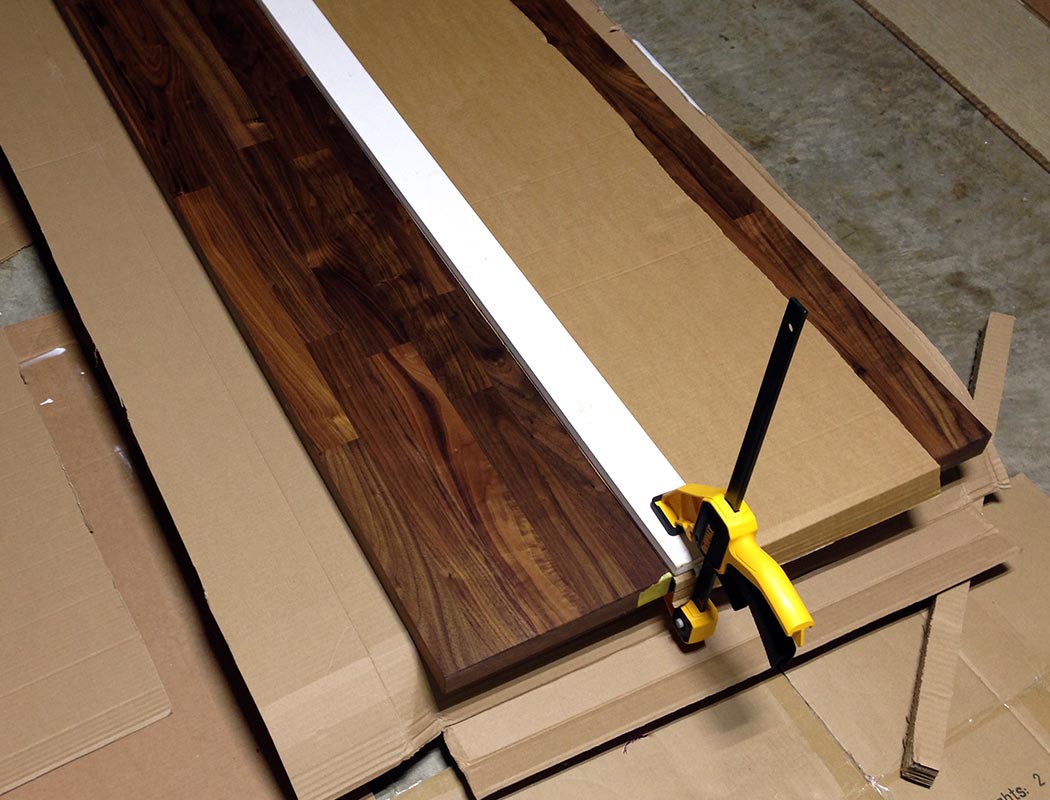
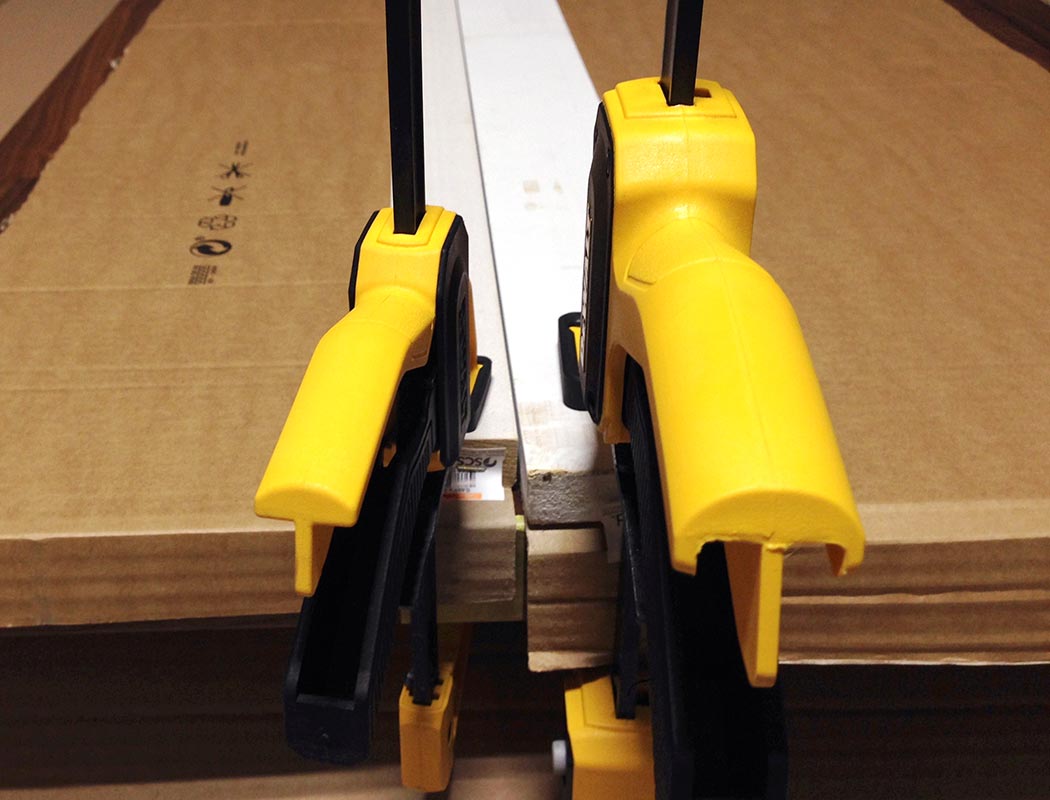
Wood Clamps available here
Potentially optional, but I found them very helpful to hold cabinets in place while mounting them to each other and invaluable for cutting the countertop down.
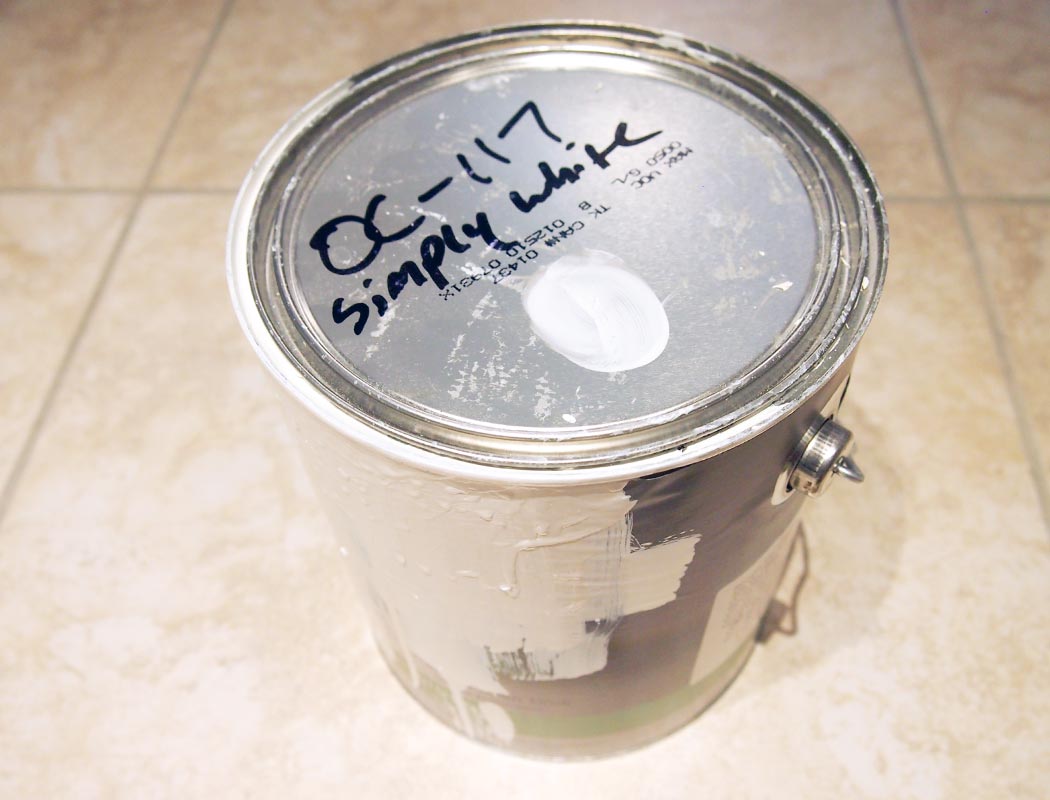
Benjamin Moore ADVANCE Semi-Gloss in Simply White (OC-117) available here
We used this to paint the drawer faces for this project to match the room's trim (and since we were painting them anyway allowed us to go with the cheapest drawer front option). Fair warning it has a very long cure time and requires decent prep and time between coats, the results we've seen so far are worth the fussiness.
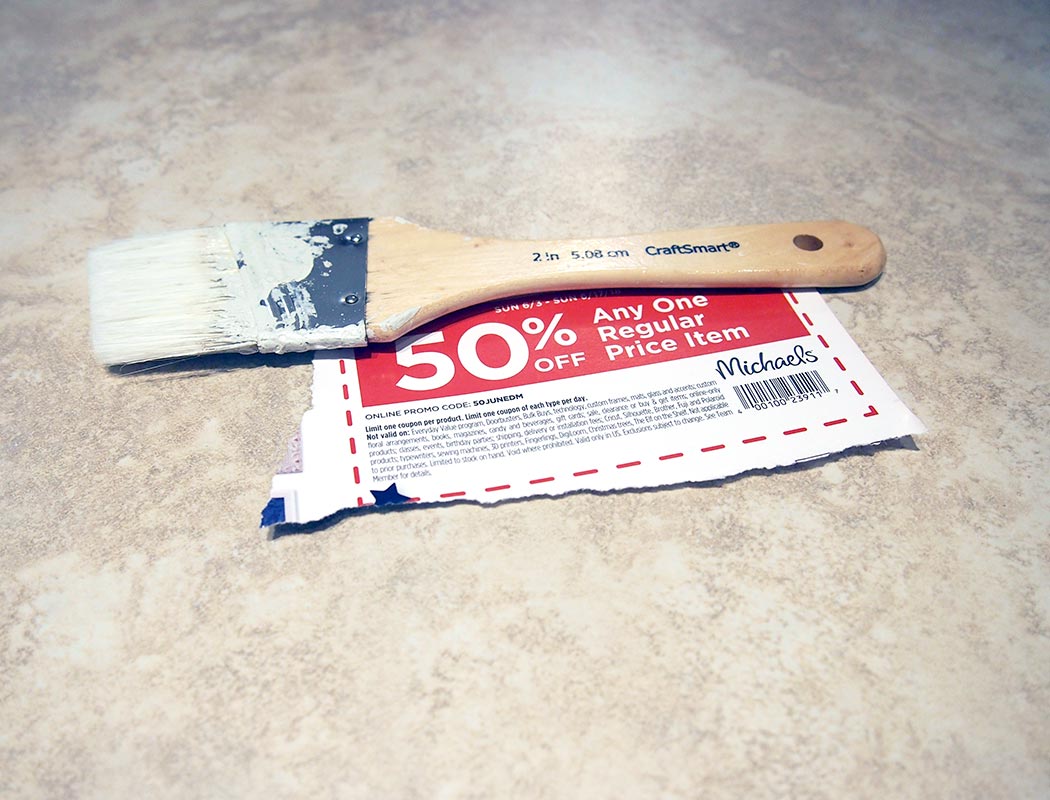
Angular White Taklon Brush Set By Craft Smart available here
My go to paint brushes, these work great with the ADVANCE and cleanup easily for multiple uses. Michael's regularly sends out 50% off coupons and they sell these in a set with three sizes. Hard to go wrong having them around — not quite disposable but you wont feel bad if you schmutz one up either.

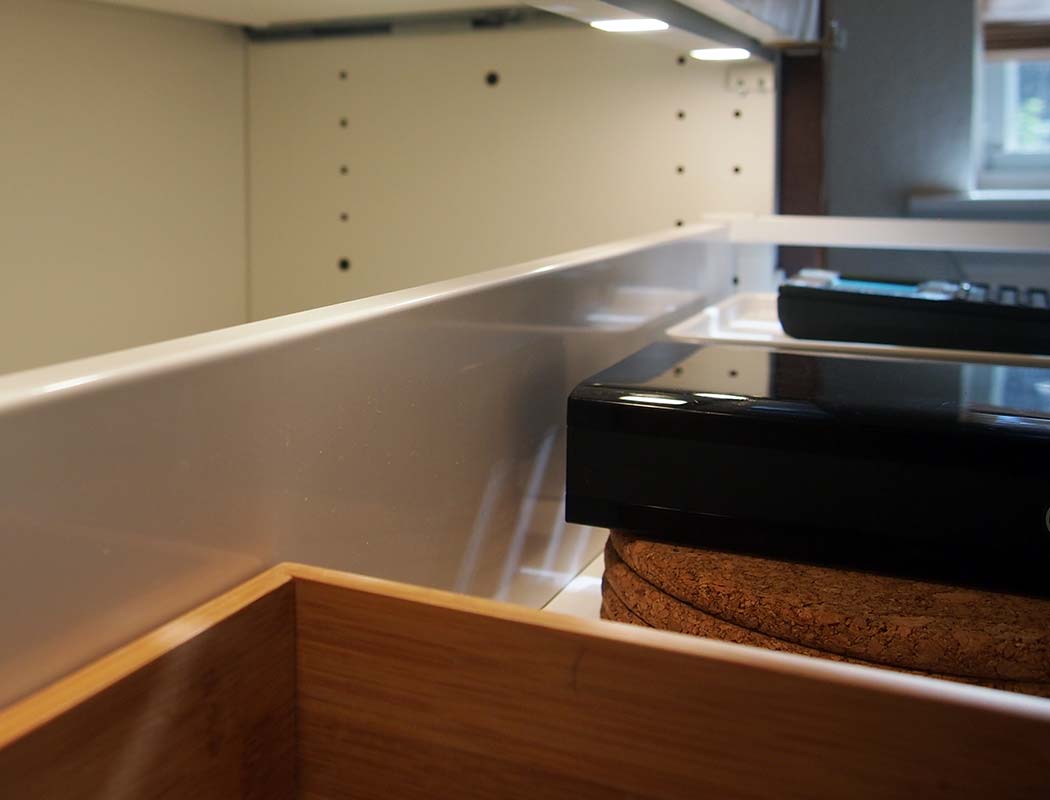
Optional - OMLOPP LED Light Strip for Drawers Amazon IKEA
We used six 29" LED light strips (Article Number: 702.966.73), an ANSLUTA Electronic transformer (Article Number: 502.883.39), and one ANSLUTA Power supply cord (Article Number: 301.214.11). While totally unnecessary, these are a fun splurge if you are so inclined.
* as an Amazon Associate we earn from qualifying purchases
Hang the IKEA SEKTION cabinets
This part should all be by the (IKEA) book. Follow their instructions and just ignore that maybe you’re not in your kitchen (or working at the suggested height). Also, spoiler alert, your walls are probably not flat, or square, or exactly vertical, etc. No worries, you can shim the railing as needed (screwing the neighboring cabenets into each other will also help with alignment… I recommend using wood clamps to hold them in position while you attach neighbors to each other).
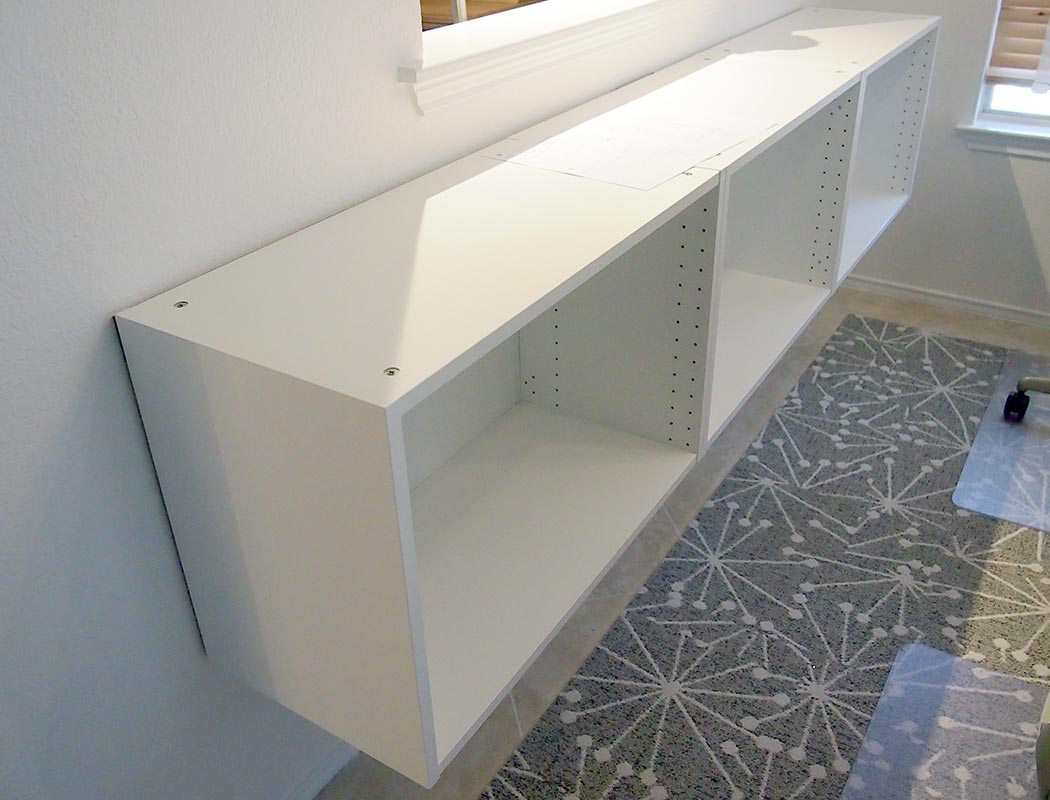
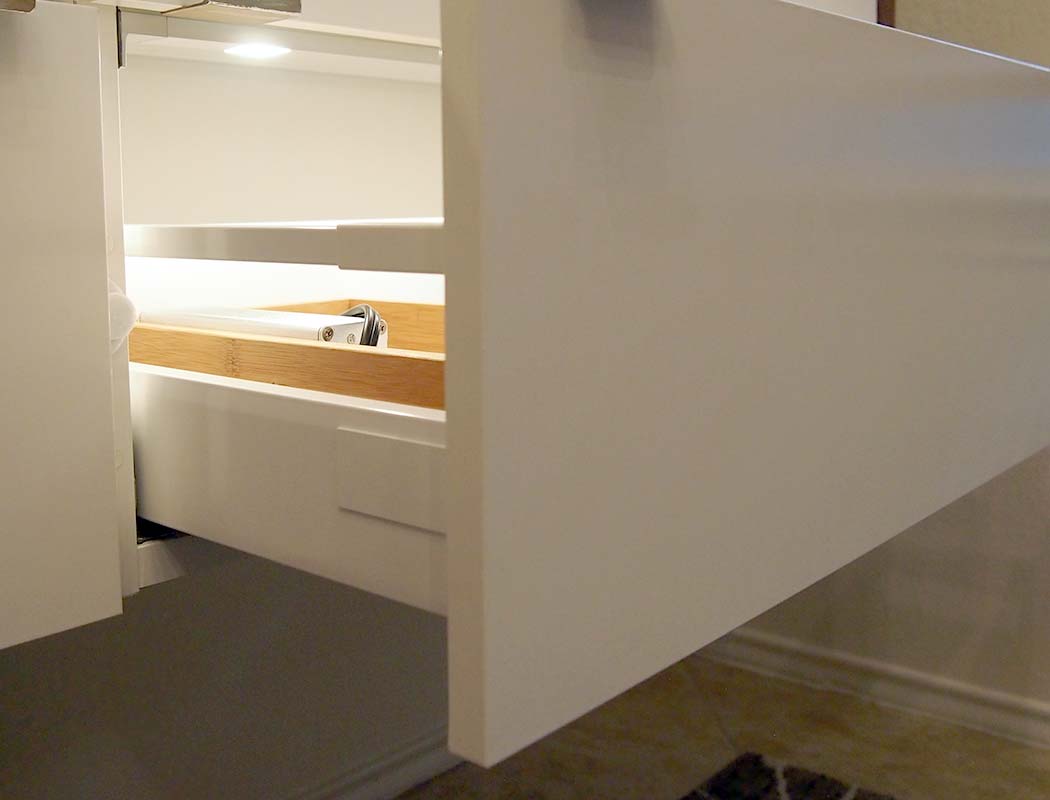
Lastly once the drawer fronts (or doors) are mounted they will all have adjustments that allow you to position them as expected relative to their neighbors.
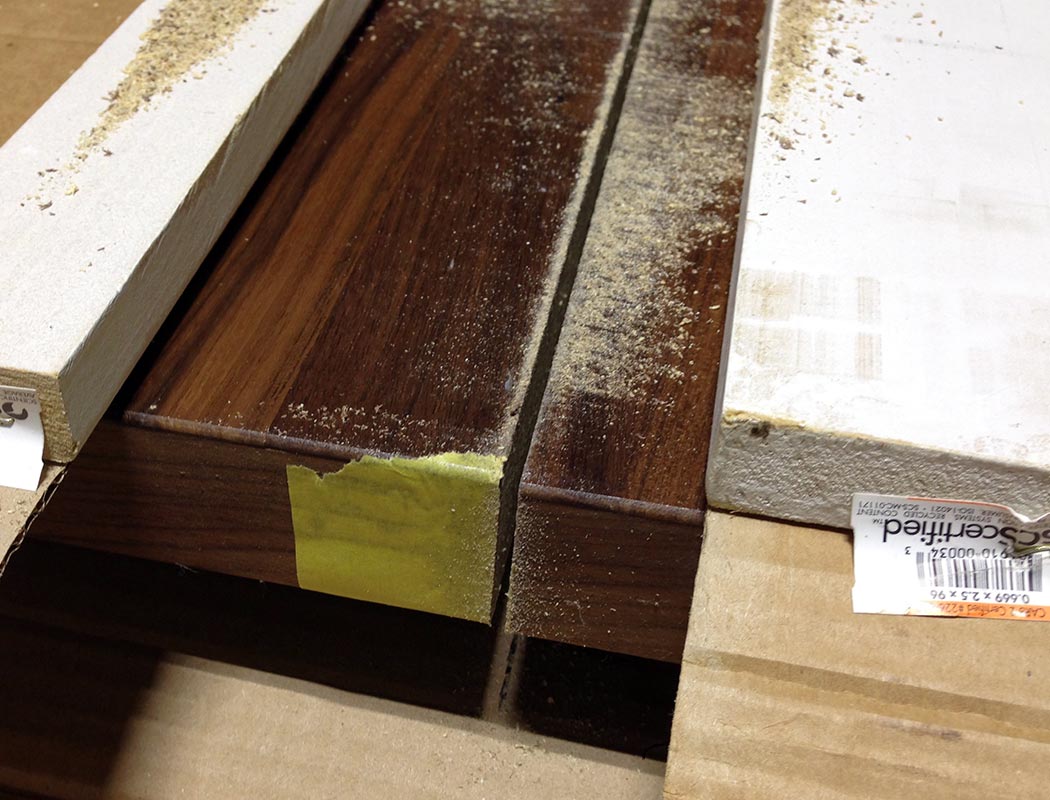
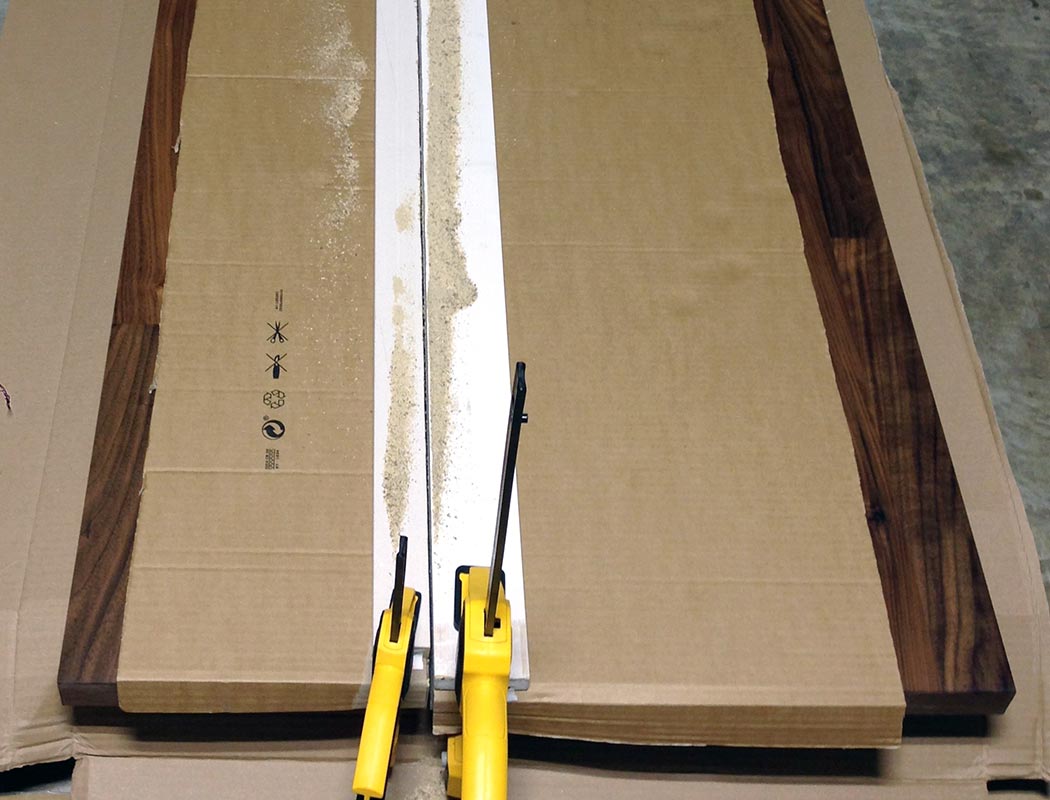
The part that took a lot longer because I didn’t use an electric saw
To cut the countertop down to the correct depth for the shallower cabinets I measured and marked the counters with tape, then clamped a few dollars worth of MDF moulding above and below the intended cut as saw guides.
After attaching the countertop frame
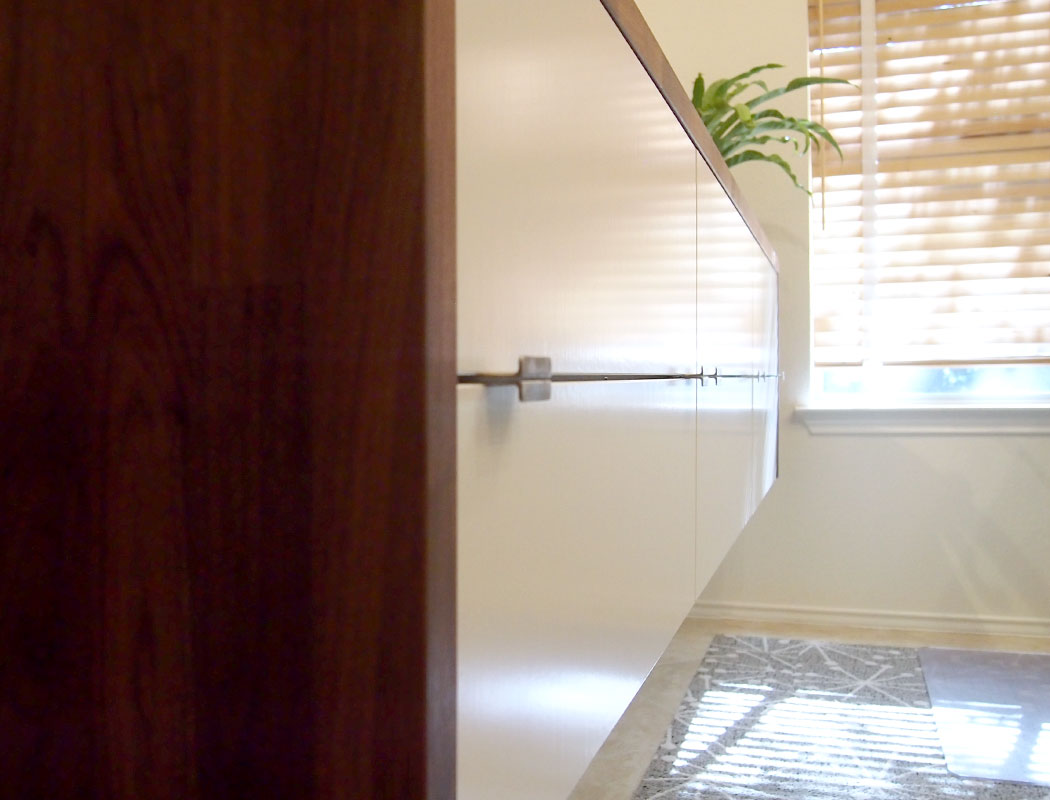
With the countertop cut I clamped it on to the frame (with the drawers temporarily removed) and screwed it in place using several wood screws for each direction. Pay careful attention to the length of your pilot holes and screws as compared to the thickness of the cabinet and countertop as you do not want to risk going all the way through the countertop (or getting close and creating a blemish).
Unnecessary but fun
Adding interior lighting to a small cabinet project seemed like a good way to try it out. It’s definitely fun and I appreciate it when digging around for things but it doesn’t add a huge amount of value when compared to the extra installation effort and cost. If you’re excited about it and don’t mind some additional headaches go for it, but I wouldn’t recommend it if you feel like it’s a painful splurge and are expecting a large payoff.

Wrap-up & follow-up
We love the extra storage and get daily use out of it. I wouldn’t hesitate to do something similar again in another space. Someone with better planning and/or woodworking skills could likely source something other than countertop for the cladding if they preferred (potentially resulting in either a cheaper project or higher quality wood). That said we are pretty big fans of butcher block in general and completely satisfied with the finish and look of the thick IKEA countertop.
PS. We purchased everything shown full price or through publicly available sales (mostly sales lol), nothing was donated or unusually discounted.